After you add a client, mePro emails them an invitation. This article follows your client from that email to joining mePro and connecting with you, and shows what they can do in the mobile app and the web portal, so you can guide them if they have questions.
Note: All clients, names, emails, appointments and other data shown in the screenshots are sample data we created for this guide. They are not real people or real records.
Step 1: The client receives a welcome email
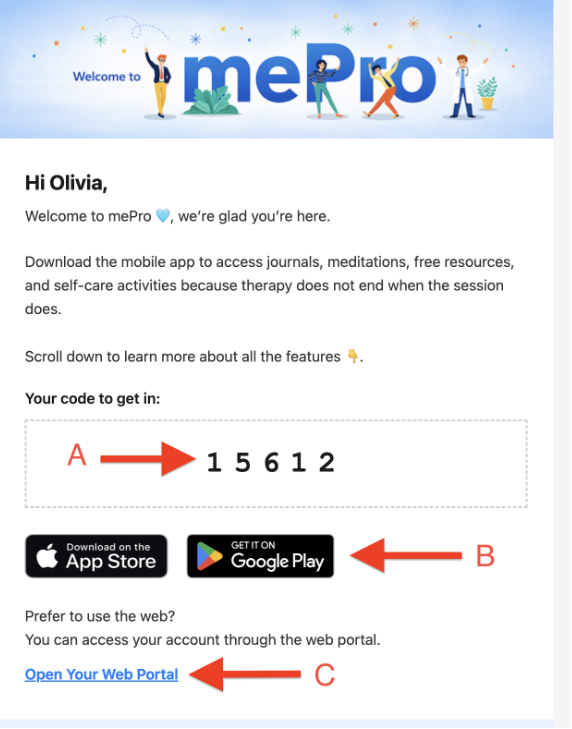
Your client receives a Welcome to mePro email. It has three parts:
- A. Your code to get in: a 5-digit invitation code, for example 1 5 6 1 2, that connects the client with you.
- B. The mobile app: buttons to download mePro from the App Store (iPhone) or Google Play (Android). The app gives clients access to journals, meditations, free resources and self-care activities between sessions.
- C. Open Your Web Portal: optionally a link for clients who prefer to use mePro in a web browser is provided too.
Download links for the mePro AI app: App Store (iPhone) and Google Play (Android).
Tip: If a client can’t find the email, use Resend invite in the Actions menu on your Clients page.
Step 2: The client joins with their code
The client can join in the mobile app or on the web. Either way, the code connects them to you automatically as their therapist.
In the mobile app
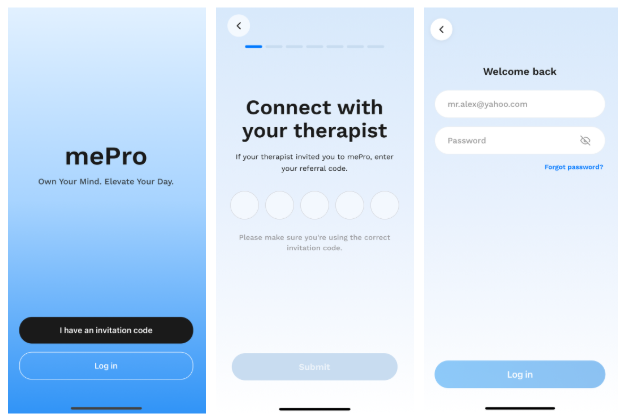
1. The client downloads mePro, opens it and taps I have an invitation code. Clients who already have an account tap Log in instead, and sign in with their email and password on the Welcome back screen. If they’ve forgotten it, they tap Forgot password?.
2. On Connect with your therapist, they enter the 5-digit code from the email and tap Submit. The app shows Please make sure you’re using the correct invitation code. as a reminder. Once the code is accepted, the client is connected with you, and the app guides them through the rest of setup. The bar at the top shows their progress.
On the web
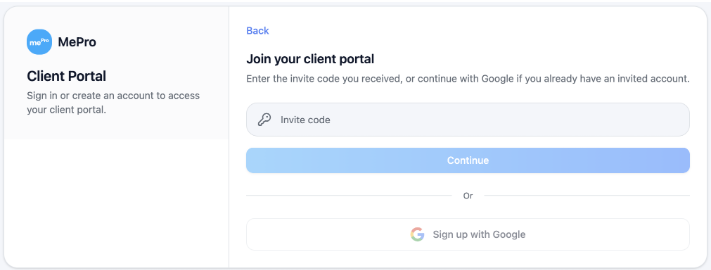
1. The client clicks Open Your Web Portal in the email. The Join your client portal page opens.
2. They type the 5-digit code in Invite code and click Continue. If they already have an invited account, they can click Sign up with Google instead.
Step 3: The client becomes Active
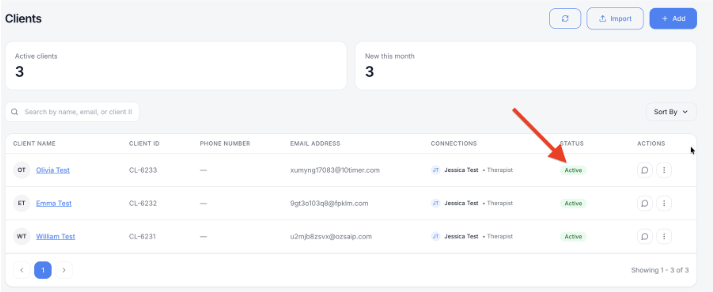
Once the client joins with their code, their status on your Clients page changes from Imported to Active, and you can message them from the Actions column. See Client status.
In the mobile app
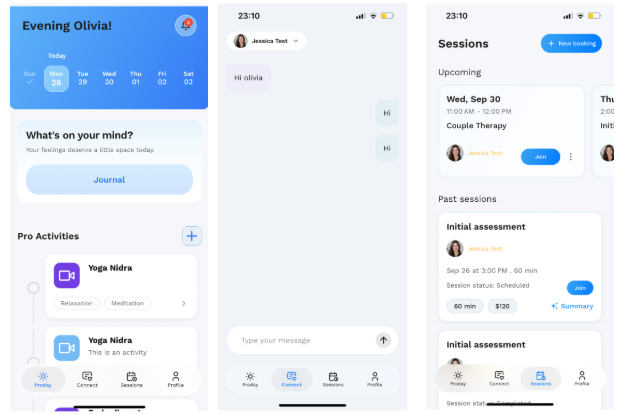
The app has four tabs at the bottom: Proday, Connect, Sessions and Profile.
Proday
Proday is the client’s home screen. It greets them by name and shows the week. Under What’s on your mind?, they tap Journal to write a journal entry, which then appears in your client’s Journals tab. Below that, Pro Activities lists the activities you’ve shared with them, such as Yoga Nidra.
Connect
Connect is where the client messages you. They type in Type your message and tap the arrow to send. Their messages appear in your client’s Chat tab, under Direct with the client.
Sessions
Sessions shows Upcoming sessions, with Join to join the video session, and Past sessions with their status and a Summary. The client books a new session with New booking.
Booking a session in the app
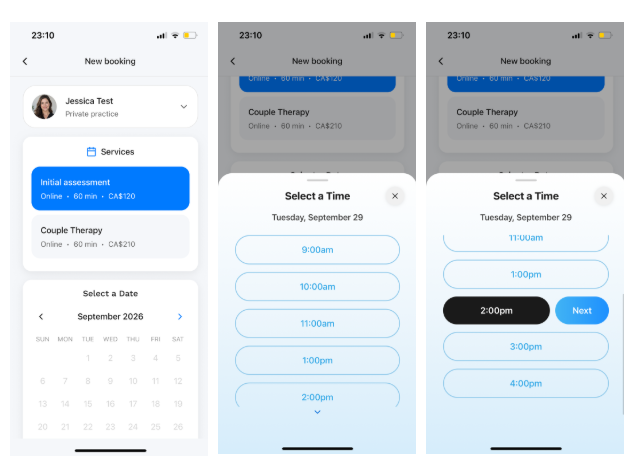
Clients can book their own sessions in the times you’ve made Bookable online in your availability.
1. In Sessions, the client taps New booking.
2. They check the therapist, choose a service, then choose a date under Select a Date. Each service shows whether it’s online, its length and price, for example Initial assessment · Online · 60 min · CA$120.
3. Under Select a Time, they tap a time, then tap Next.
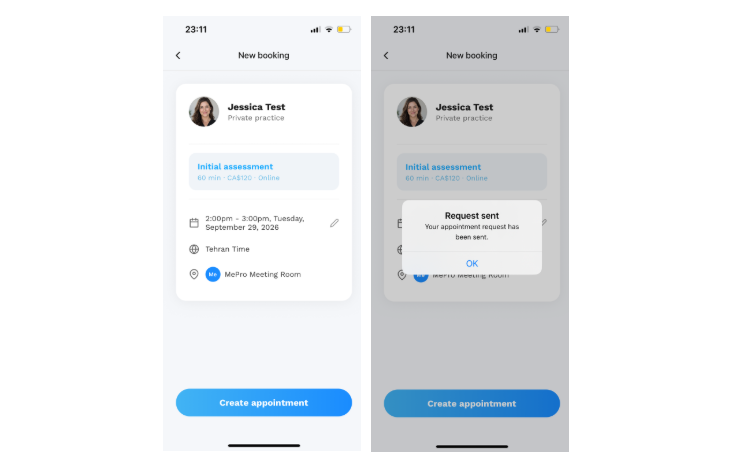
1. They check the booking details and tap Create appointment. The summary shows the therapist, service, date and time, and time zone. They can tap the pencil icon to change the time.
2. The app shows Request sent – Your appointment request has been sent. They tap OK.
In the web portal
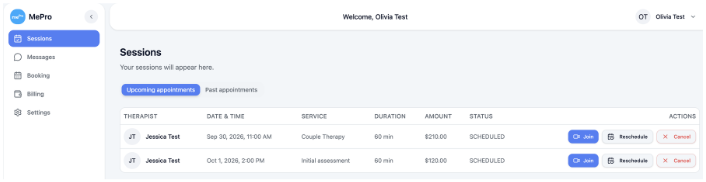
When your client signs in to the web portal, they see Welcome with their name at the top, and a menu on the left with Sessions, Messages, Booking, Billing and Settings.
Sessions
Sessions lists the client’s appointments, split into Upcoming appointments and Past appointments. For an upcoming appointment, the client can click Join to join the virtual session, Reschedule to move it, or Cancel to cancel it.
Messages
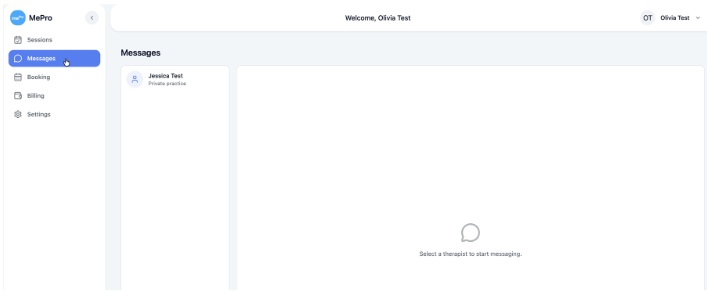
Messages lists the client’s therapists. The client clicks a therapist to open a conversation.
Booking
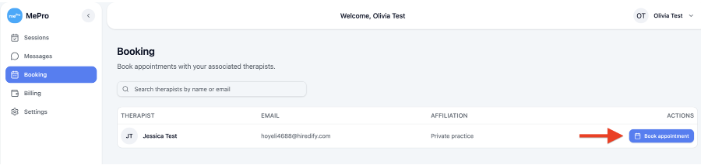
1. The client clicks Booking, then Book appointment next to your name.
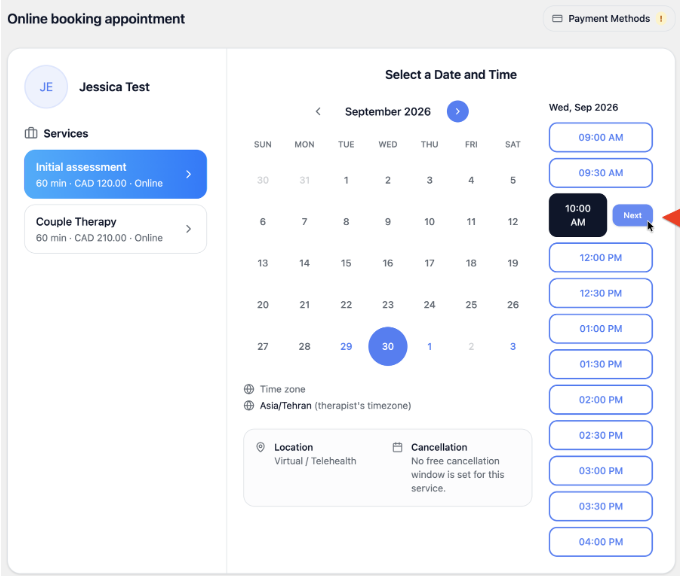
2. On the Online booking appointment page, they choose a service. The page also shows your time zone, the Location (for example Virtual / Telehealth) and the Cancellation policy for the service.
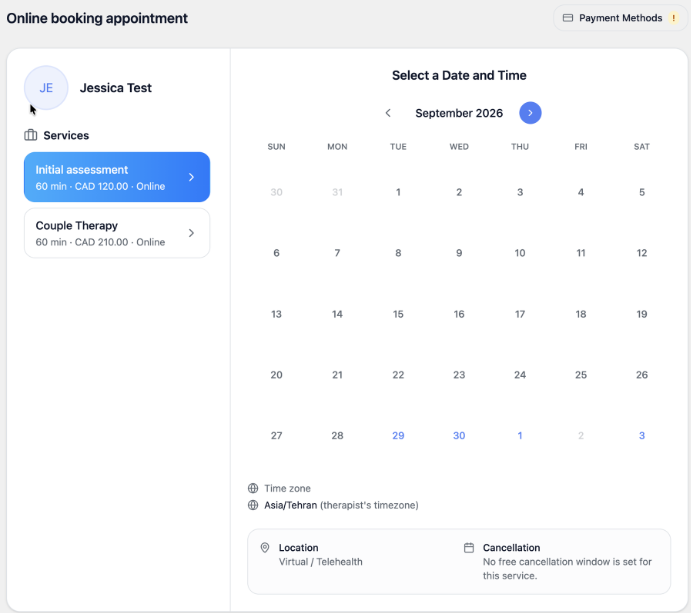
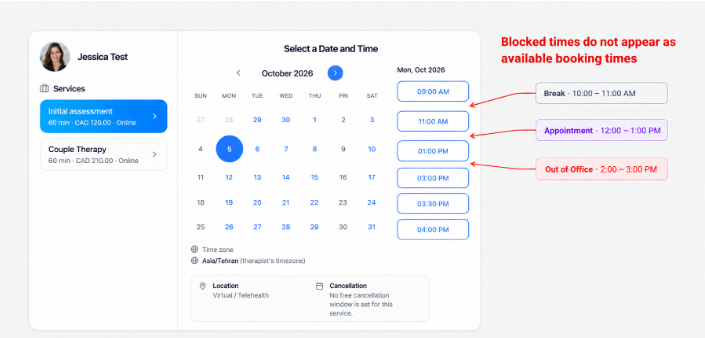
3. They choose a date, then a time, and click Next. Only times you’re available are shown. Times blocked by a break, an existing appointment or out-of-office time don’t appear.
Billing
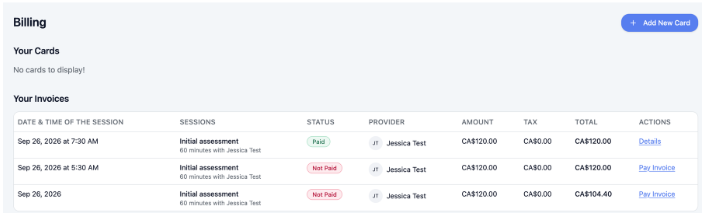
Billing shows the client’s saved cards under Your Cards, and their invoices under Your Invoices with the status Paid or Not Paid. For an unpaid invoice, the client clicks Pay Invoice. For a paid one, they click Details. To save a card, they click Add New Card.